Connect to Mikrotik Router Serial Console Port
I added a too restrictive firewall rule to my Mikrotik router and locked myself out of the machine, because it dropped all incoming TCP connections. The only access I allowed was via their web-UI and SSH, both TCP based protocols - I was locked out.
To be able to disable the problematic firewall rule there were two options:
- I reset the router to factory default and re-apply the config file I have in my git repository.
- Connect to the serial console, login and disable the firewall rule again
For the first option the problem was twofold: I’d lose some other useful firewall rules that I added inbetween the last git commit and the “locking me out” one. And I don’t have access to the factory admin password anymore, doing the factory reset likely would have locked me out for a long time of the router. (you can request the factory password from your vendor, they have a mapping of serial-number to password).
Second option posed the problem that I do not have a RJ45 to DB9 serial adapter, aka “Cisco style” serial port cable. The pin-out is very well described on Mikrotik’s documentation pages https://help.mikrotik.com/docs/spaces/ROS/pages/328139/Serial+Console#SerialConsole-RJ45TypeSerialPort
I have used PC-Engines Alix and APU boards quite extensively. Those are headless machines, that can only be serviced using a serial console. Therefore I had a few of their USB to serial adapter’s at home. I also have a RJ45 crimping tool and some low quality ethernet copper network cables. This made me consider the second option, thinking I could jerry rig a RJ45 to DB9 cable myself.
Here’s the pinout provided by Mikrotik if you were to build your own cable that can be plugged into a serial-port found on a PC:
| RJ45 | wire color | DB9 female pin |
|---|---|---|
| 1 RTS | white/orange | 8 CTS |
| 2 DTR | orange | 6 DSR |
| 3 TXD | white/green | 2 RXD |
| 4 GND | blue | 5 GND |
| 5 GND | white/blue | 5 GND |
| 6 RXD | green | 3 TXD |
| 7 DSR | white/brown | 4 DTR |
| 8 CTS | brown | 7 RTS |
for orientation, DB9 pin number 6 is on the shorter row bottom right-most. DB9 pin 5 is top row left-most. Pins 1 and 9 are unused, look at the Mikrotiks page for a nice visualisation.
What I did was, take an old self made ethernet cable, cut it in two, strip the individual twisted pair wires and plug it into my PC-engines USB to DB9 female adapter. (Side-note: my old cable was not wired T-568A but T-568B style, there’s a good change you will have to swap your colors around.)
That did not work, I was not able to connect to the serial console that way.
Then I realised that the proposed cable is supposed to go onto a male serial port socket found on a PC, well that is what the PC-engines female adapter can be used for too - I likely have to rewire the pins, because there’s some magic going on inside the USB to serial adapter. I went on pc-engines page, and indeed they have the wiring schema of it - turns out that it internally behaves as if a null-modem cable was attached. Armed with that info I rewired it to match the pins function like so:
| DB9F | RJ45 color |
|---|---|
| 1 DCD | |
| 2 RXD | 6 RXD green |
| 3 TXD | 3 TXD white/green |
| 4 DTR | 2 DTR orange |
| 5 GND | 4, 5 blue white/blue |
| 6 DSR | 7 DSR white/brown |
| 7 RTS | 1 RTS white/orange |
| 8 CTS | 8 CTS brown |
| 9 XXX |
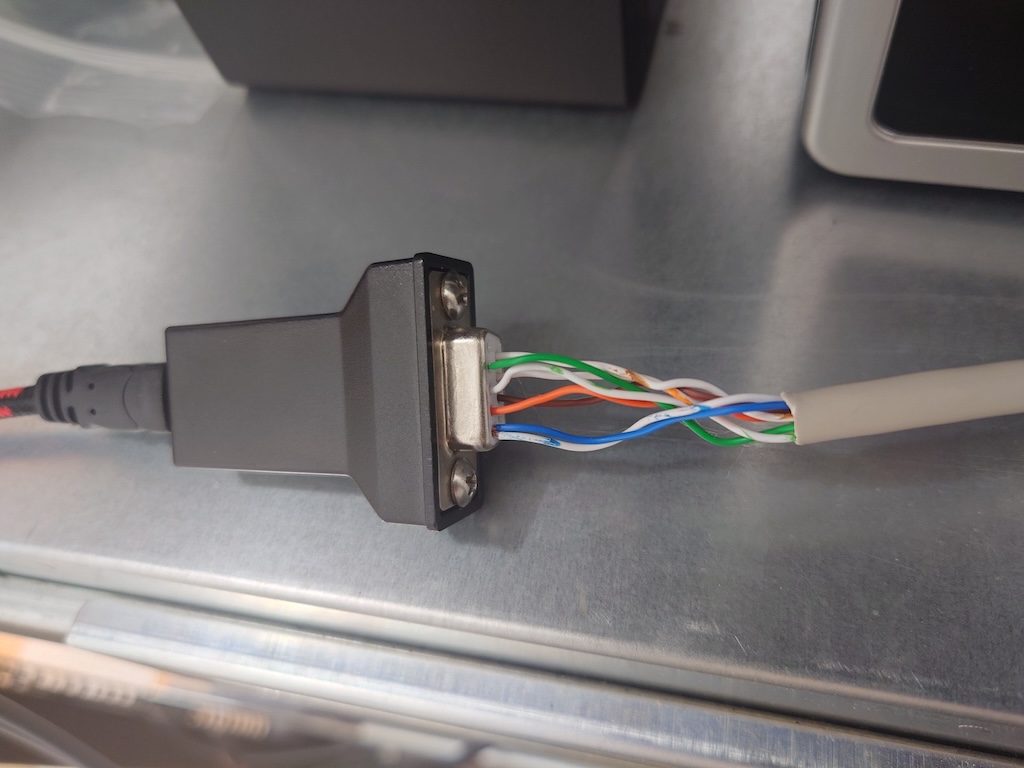
Here’s a photo of that hack:

On the other end was still the RJ45 plug, I did not have to use my crimping tool.
Connecting from macOS was easy using minicom -s to configure it to use /dev/tty.usbserial-01XXXX with 115200 8N1 and save the settings. Finally connect using minicom, disable the firewall rule and back to using SSH again :).